Before this: A tour of the interface.
You’re going to turn a plain white board into a product shot: colour, logos, pad, lighting and a final image on disk. None of this changes the shape, the STL or the volume.
1. Enter Finish mode
Open an .s3dx and press A (or the Finish button). If you’re in the editor, leave it first with E.
At the top of the FINISH panel, an indicator tells you whether your changes are saved. Everything is saved automatically to name.acabado.json, next to the .s3dx. The .s3dx itself is never touched.
Tip: if you’re starting from a template, first remove the sample logos in LOGOS with Remove logo.
2. Paint the deck, bottom and rails
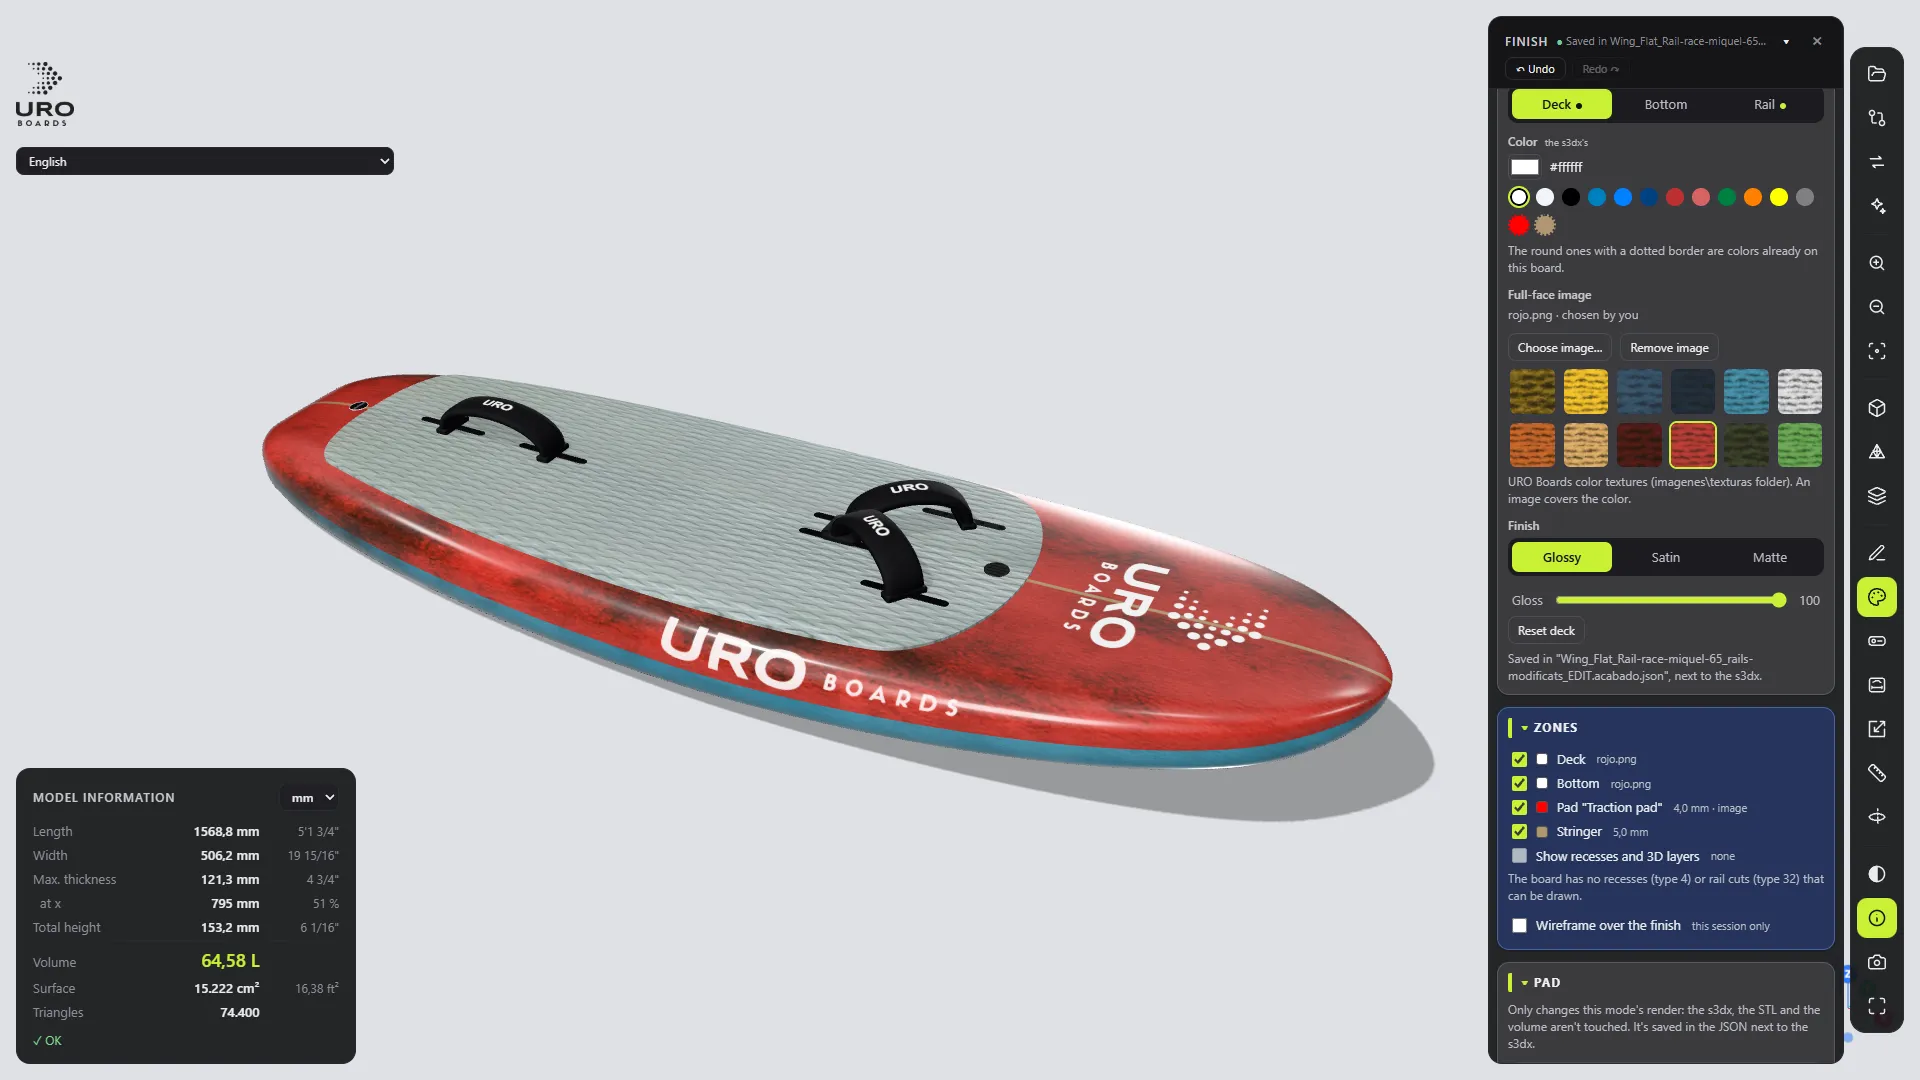
In BOARD, pick the zone: Deck, Bottom or Rail.
- Color: the picker or a swatch (URO blue, Navy blue, Red, White…).
- Full-face image: a URO texture from the gallery or Choose image…. An image covers the colour.
- Finish: Matte, Satin or Glossy, plus the Gloss level.
The rails follow the bottom until you give them a colour of their own.
Result: the board changes instantly. Ctrl+Z undoes each step.
3. Place the logos
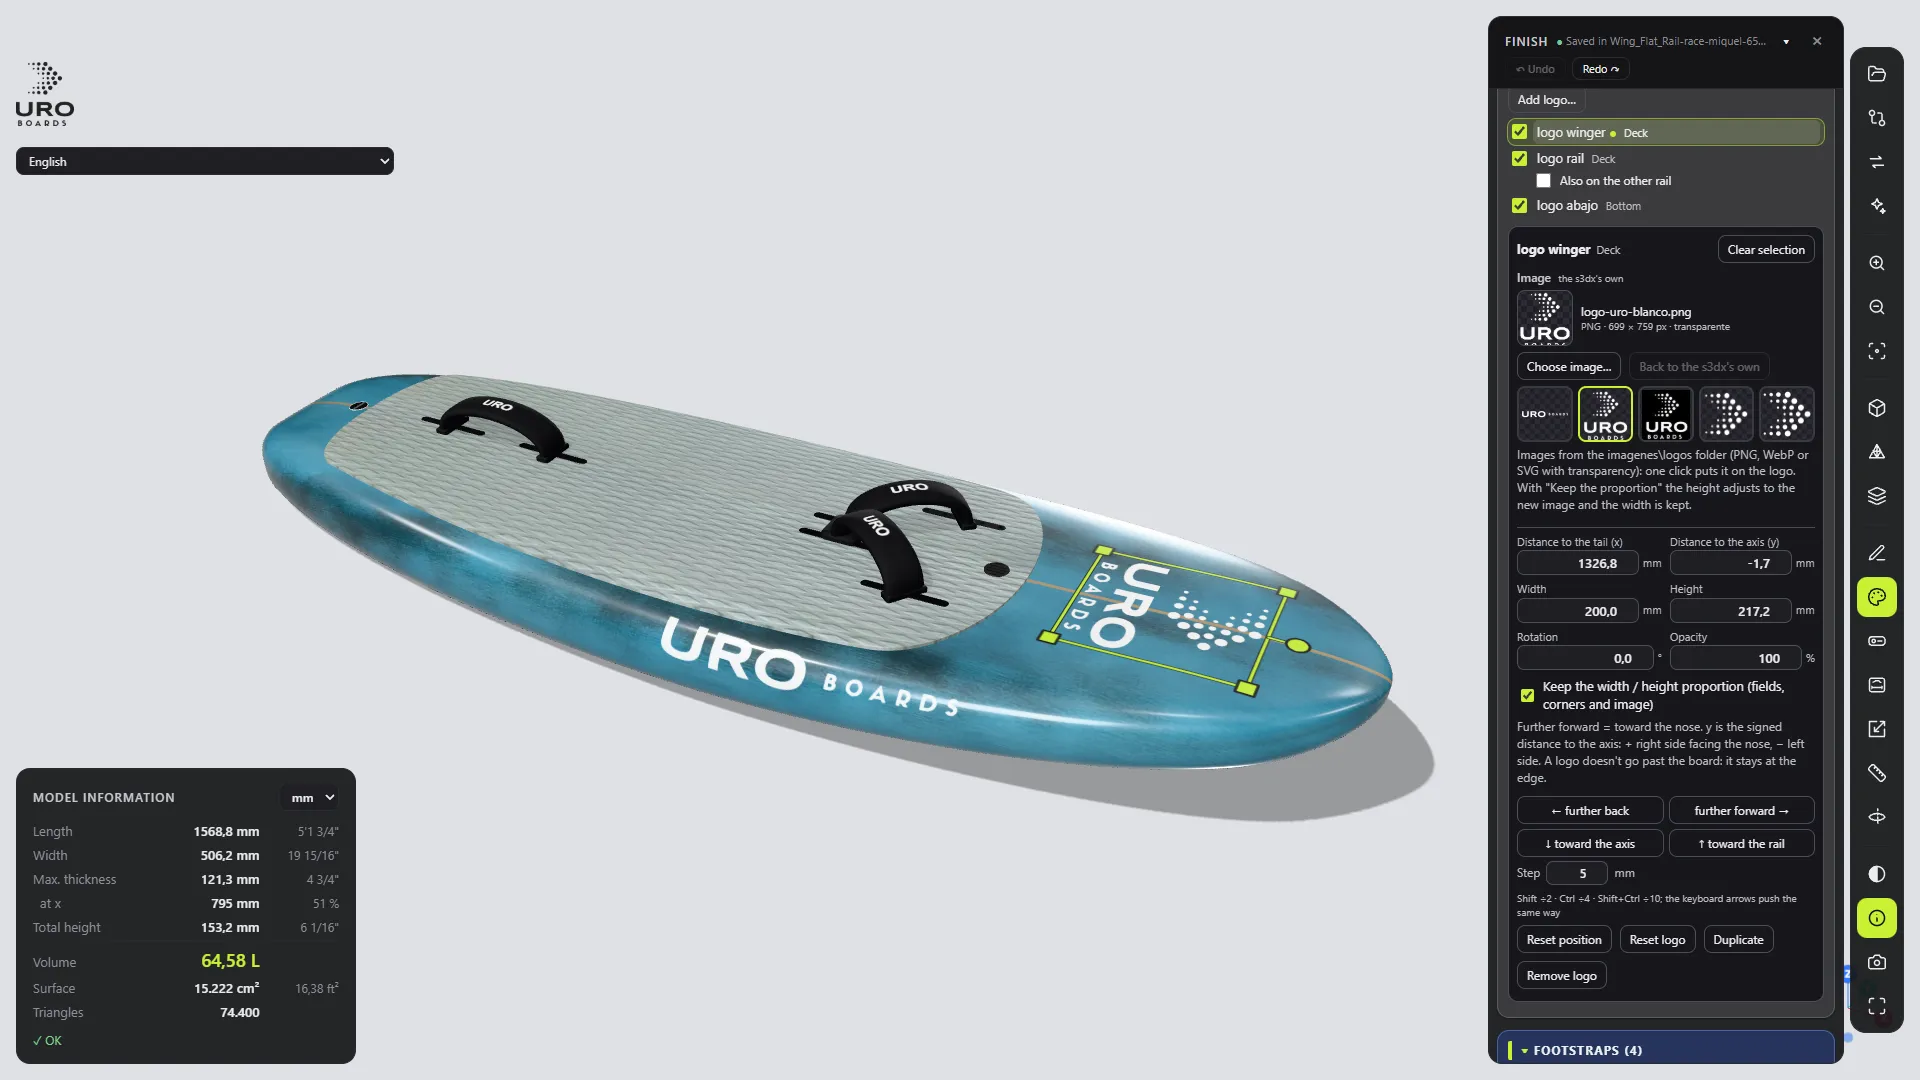
In LOGOS:
- Click Add logo…, pick the face (Deck, Bottom or Pad) and a logo from the gallery, or Choose file… for one of your own (PNG, WebP or SVG with transparency).
- The logo appears in the centre of the board. Drag it, or set its position, size, rotation and opacity with the fields or the arrows.
- To put it on the rail, drag it towards the rail and tick Also on the other rail.
- Duplicate places a copy 30 mm further forward.
On the pad, tick Negative relief (inset) so the logo is engraved.
4. Design the pad
In PAD (only if the board has a pad):
- colour or image;
- Thickness from 0.5 to 15 mm (render only);
- Pattern: Smooth, Diamonds or Grooves, with groove pitch, angle, width and depth.
5. Check the footstraps and hardware
- FOOTSTRAPS: suggested straps over the inserts. Change their style, colour and finish.
- ACCESSORIES: tick Show the accessories in the render to see boxes, plugs and screws in full 3D.
6. Set up the scene
In SCENE:
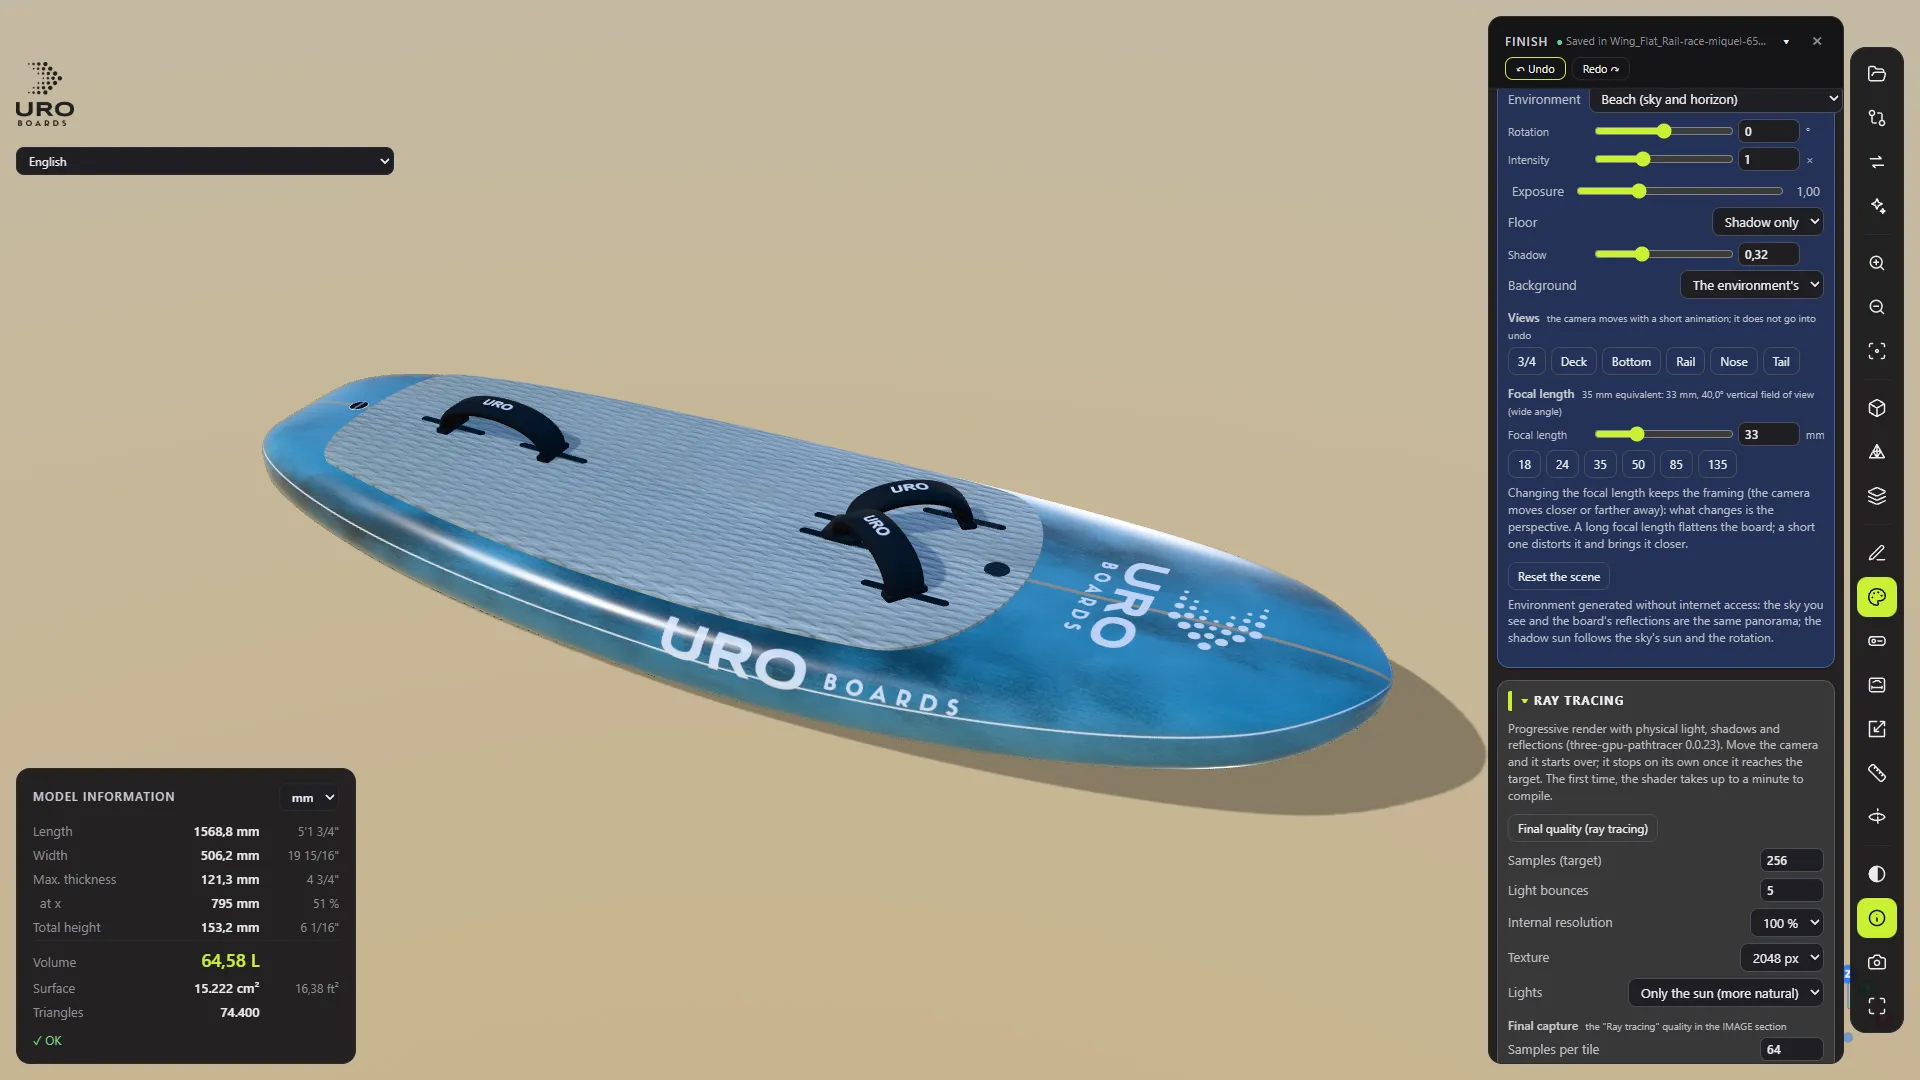
- Environment: Bright studio for a catalogue shot, Beach or Water for something with more life.
- Adjust the light’s Rotation, Intensity and Exposure.
- Floor: leave Shadow only, or None if you’re going to cut the board out.
- Views: 3/4, Deck, Bottom, Rail, Nose or Tail. Then fine-tune with the mouse.
- Focal length: 50–85 mm gives a natural perspective; a wide angle exaggerates the nose.
7. Try ray tracing (optional)
Click Final quality (ray tracing). The view becomes a progressive render with bounced light and reflections. At the top you see how many samples it has so far.
The first time, it can take up to a minute to get ready. If you move the camera, it starts again. Back to normal view gets you out instantly.
If the button is greyed out, your graphics card doesn’t offer WebGL2: the normal render still works.
8. Save the image
In IMAGE:
- Size: 3840 × 2160 (4K). It goes up to 7680 × 4320 (8K), plus Custom, up to 16384 px per side.
- Quality: High (16) for a final image. Draft to test the framing.
- Tick Transparent background if you’re going to place it over another background. It needs PNG.
- Click Capture and save….
A dashed frame shows you what goes into the image. The progress bar tells you how much is left; Cancel stops it without leaving anything half-done.
Result: the Save As dialog opens with a name like <board>_<view>_3840x2160.png. If you moved the camera, the view part of the name is libre (“free”).
Common mistake: asking for a JPG with a transparent background. A JPG doesn’t support transparency: choose PNG.
9. Start again if you need to
Reset the whole finish… puts everything back the way the .s3dx brings it, in a single step that Ctrl+Z undoes.
If you save the board under another name from the editor or from rescaling, the finish is copied to the new file. Watch out with rescaling: logos, lines and the pad don’t scale. Check them in Finish mode.