Before this: Edit the outline, rocker and thickness.
You’re going to set up a wing foil board: two foil tracks on the bottom, a flat bottom underneath them, four footstrap inserts on the deck and their straps. At the end you’ll check the stance on the drawing.
You need an .s3dx open. If the board already has template accessories you don’t want, remove them first with Delete (Del).
1. Open the editor and the accessories
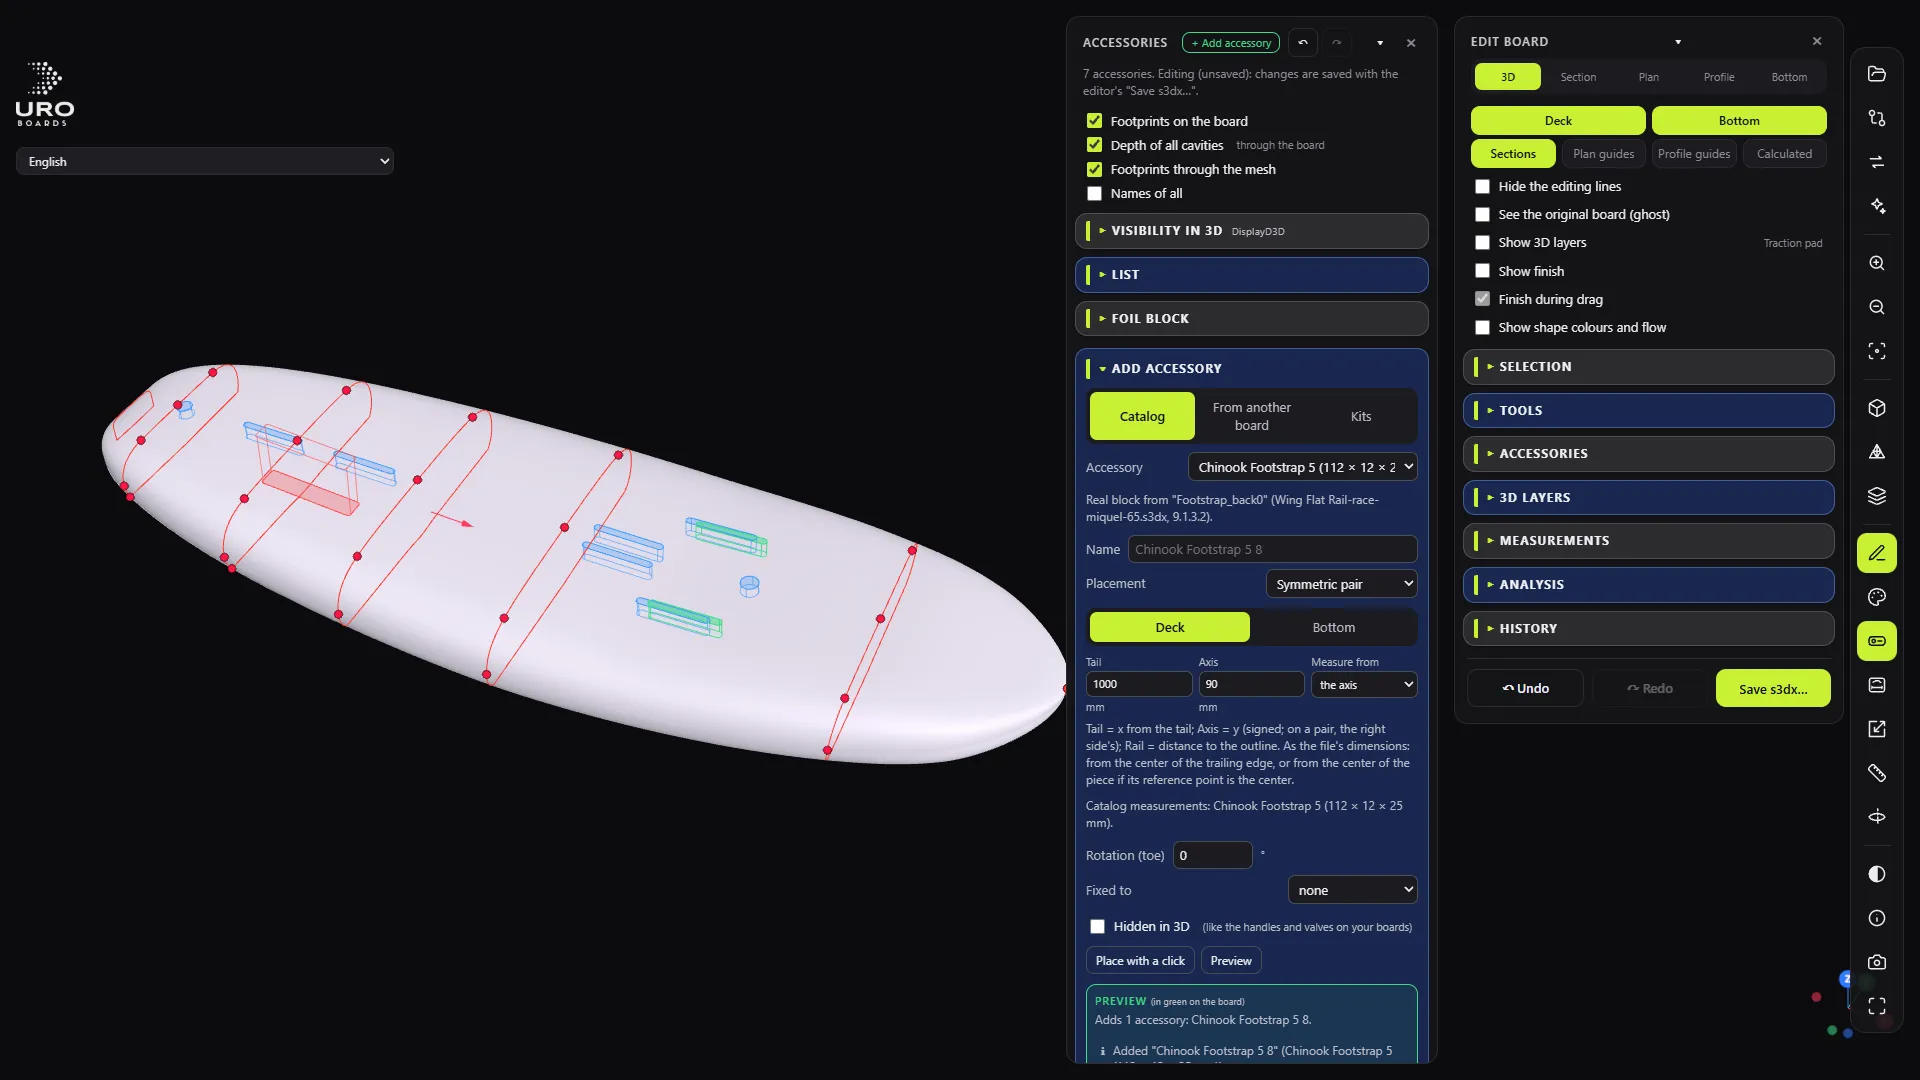
Press E (editor) and then P (accessories). The ACCESSORIES panel appears to the left of the editor panel, with the LIST of what the board already has.
If you only press P, without the editor, the panel is read-only and tells you “Press E to edit or add accessories”.
Shortcut: under + Add accessory → Kits you’ll find complete URO board setups (tracks, inserts, leash…), with the track spacing and their distance from the tail as parameters. If one suits you, use it and skip to step 5.
2. Add the foil tracks
- Click + Add accessory. ADD ACCESSORY opens on the Catalog tab.
- Accessory: the 35 cm foil track.
- Placement: Symmetric pair. This creates both tracks, one on each side of the centre line.
- Face: Bottom.
- Tail: the distance from the tail, in mm.
- Axis: the distance from the centre line to the right-hand part, in mm. It’s half the spacing between the tracks.
- Click Preview.
Result: the tracks show up in green on the board. Below, the PREVIEW tells you what’s going to be added and whether there are any warnings.
If everything adds up (“No warnings for the new accessories”), click Add. It’s a single undo step.
Tip: instead of typing the tail and axis values, click Place with a click and click on the board where you want the part. Then fine-tune the numbers.
3. Flatten the bottom under the boxes
A foil needs to sit on a flat bottom.
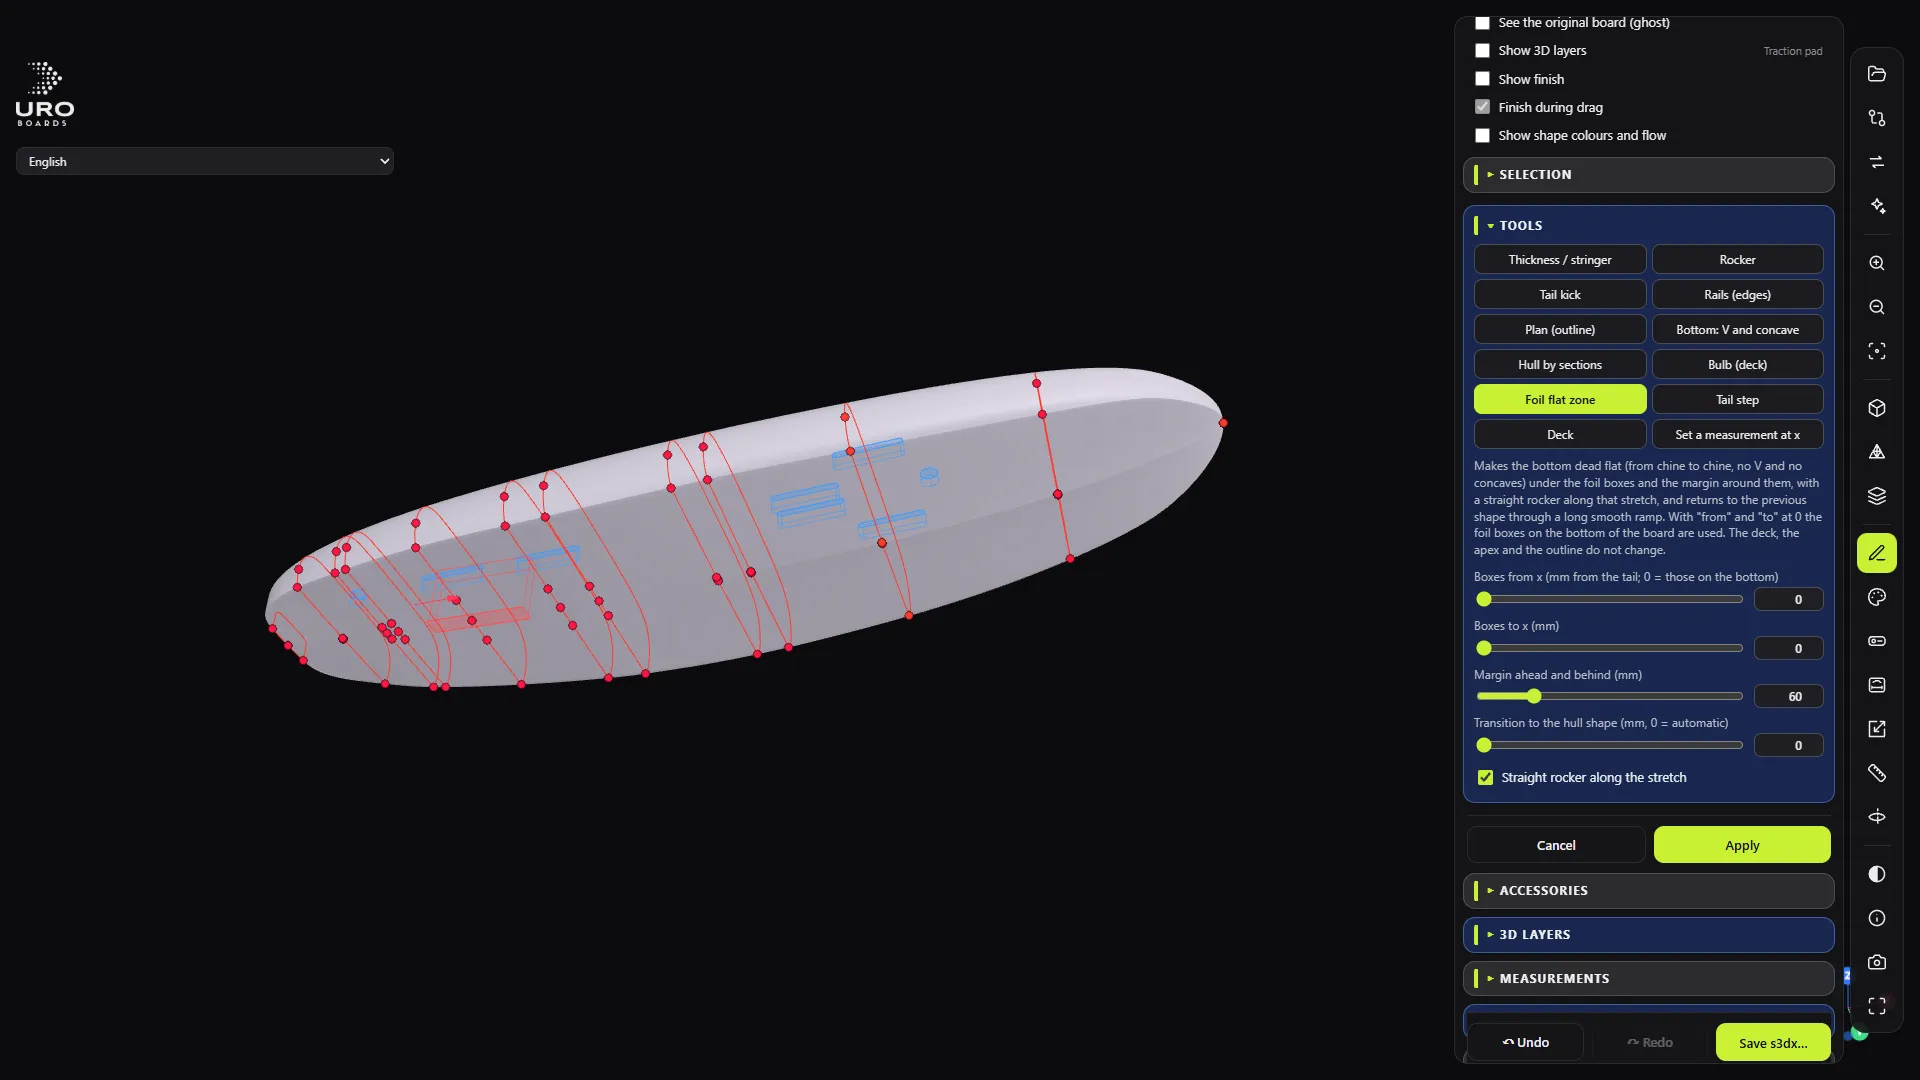
- In TOOLS, pick Foil flat zone.
- Leave Boxes from x and Boxes to x at 0: the program uses the foil boxes on the bottom.
- Margin ahead and behind (mm): how much flat bottom you leave beyond the boxes.
- Leave Straight rocker along the stretch ticked.
- Click Apply.
Result: under the boxes, the bottom is flat from chine to chine, with no V or concaves, and it blends back into the previous shape with a gentle ramp. The deck, the apex and the outline don’t change.
4. Add the footstrap inserts
A wing board usually has two rear inserts on the centre line and two front pairs.
- + Add accessory → Catalog → Accessory: the footstrap insert.
- Face: Deck.
- For the rear ones: Centered on the axis, plus its Tail distance. Repeat for the second insert.
- For the front ones: Symmetric pair, with its Tail and its Axis.
- If you want one insert to move with another, pick that part in Fixed to.
- Preview → Add.
5. Check the warnings
In the WARNINGS section of the panel, make sure there are no:
- holes leaving less than 5 mm to the other face;
- overlapping accessories;
- accessories outside the outline.
Pick any accessory in the list to see its DETAIL: distance to the tail, to the nose and to the rail, and how much material is left. Move it by dragging or with the arrow keys (1 mm; Shift 0.1 mm; Ctrl 10 mm).
6. Save the board
Click Save s3dx…. The accessories are written to the new file and follow the shape if you later change the thickness or the rocker.
7. Look at the straps
Leave the editor (E) and press A to open Finish mode. In the FOOTSTRAPS section the program already suggests straps based on your inserts: a rear one between the two centre-line inserts and two front ones.
- Add strap puts an arch between two inserts. Add V strap uses three anchor points.
- Each foot of the strap comes from a drop-down with the board’s inserts, so you can spread them however you like.
- Change the style, colour and size of All straps or of just one.
If there’s no clear suggestion (for example, a single rear insert), the panel tells you why. You can always add them by hand.
8. Check the stance on the drawing
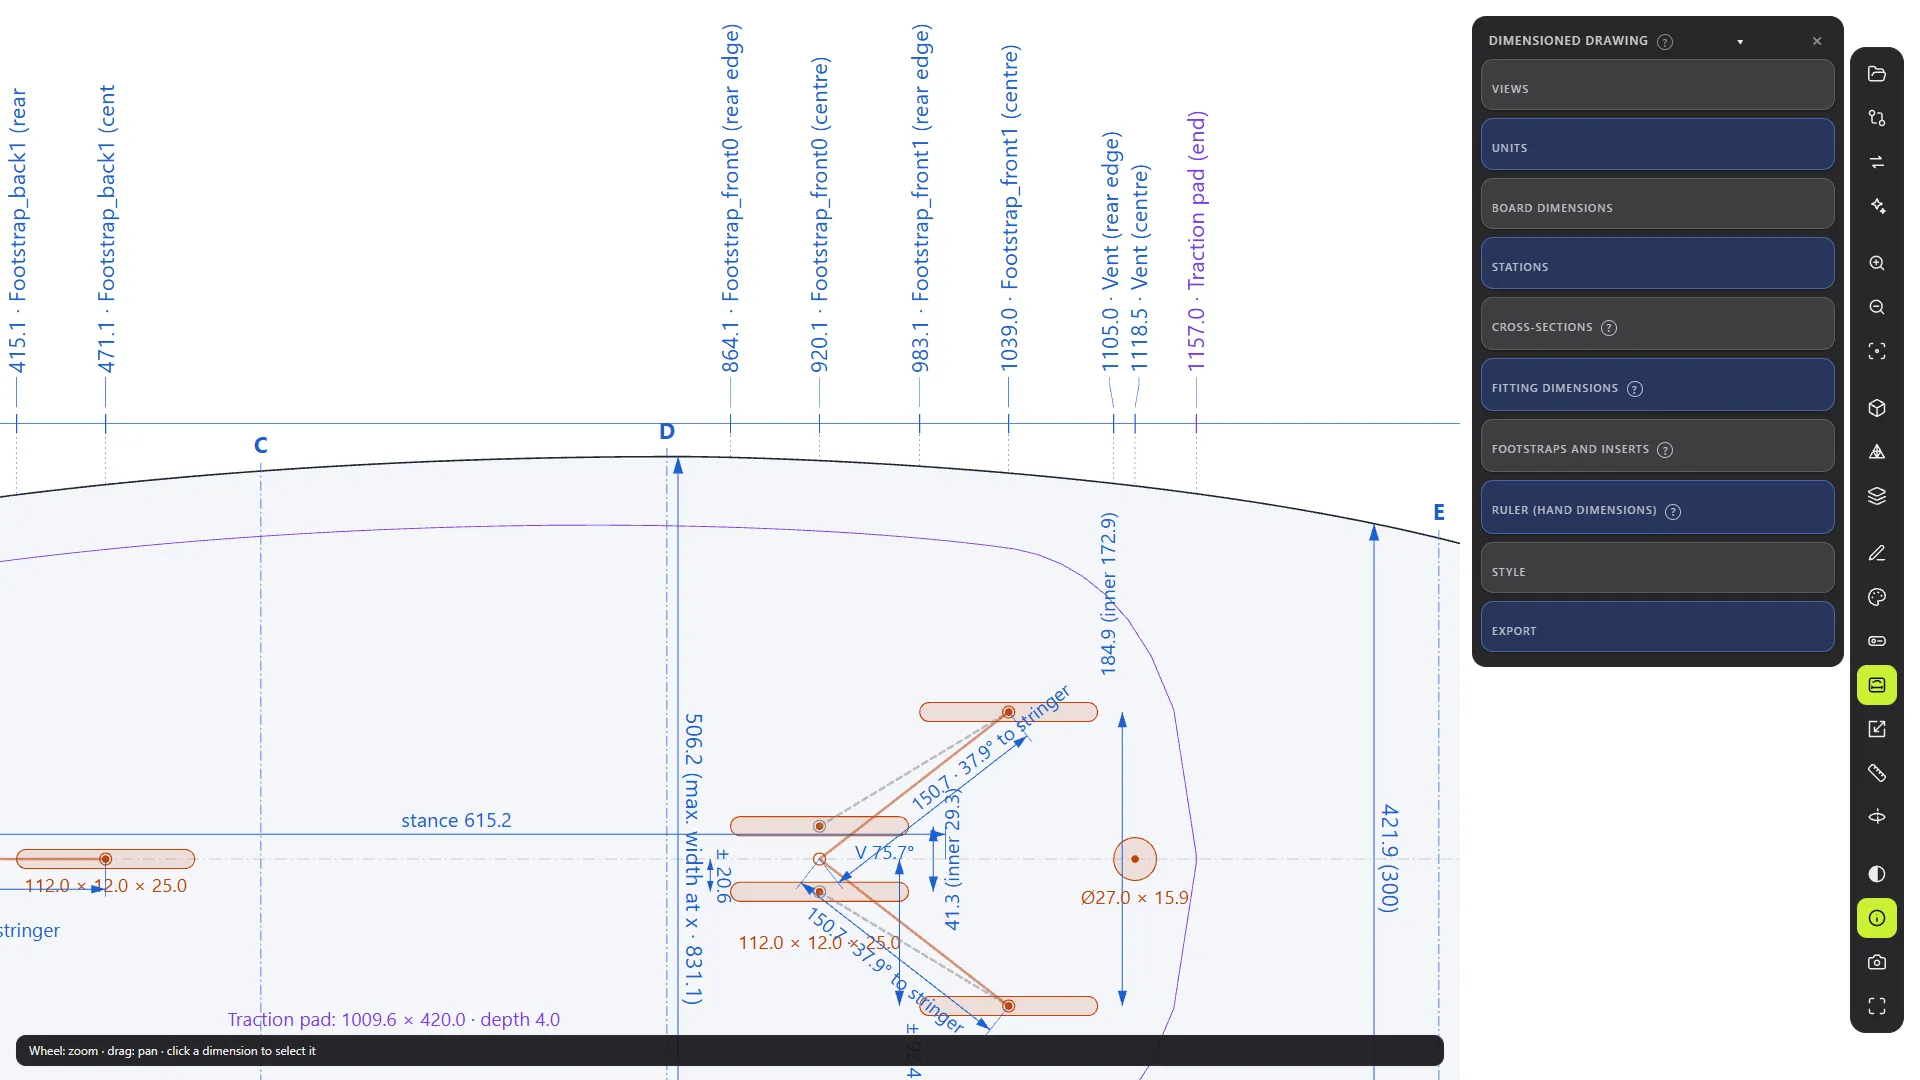
Leave Finish mode (A) and press B. In FOOTSTRAPS AND INSERTS, tick the spacing between inserts, the angle to the centre line and the Stance (rear → front). In FITTING DIMENSIONS you get the distance from each box to the tail and to the centre line.
The catalogue uses real blocks from URO boards. Check whatever you save in your design program before you build.