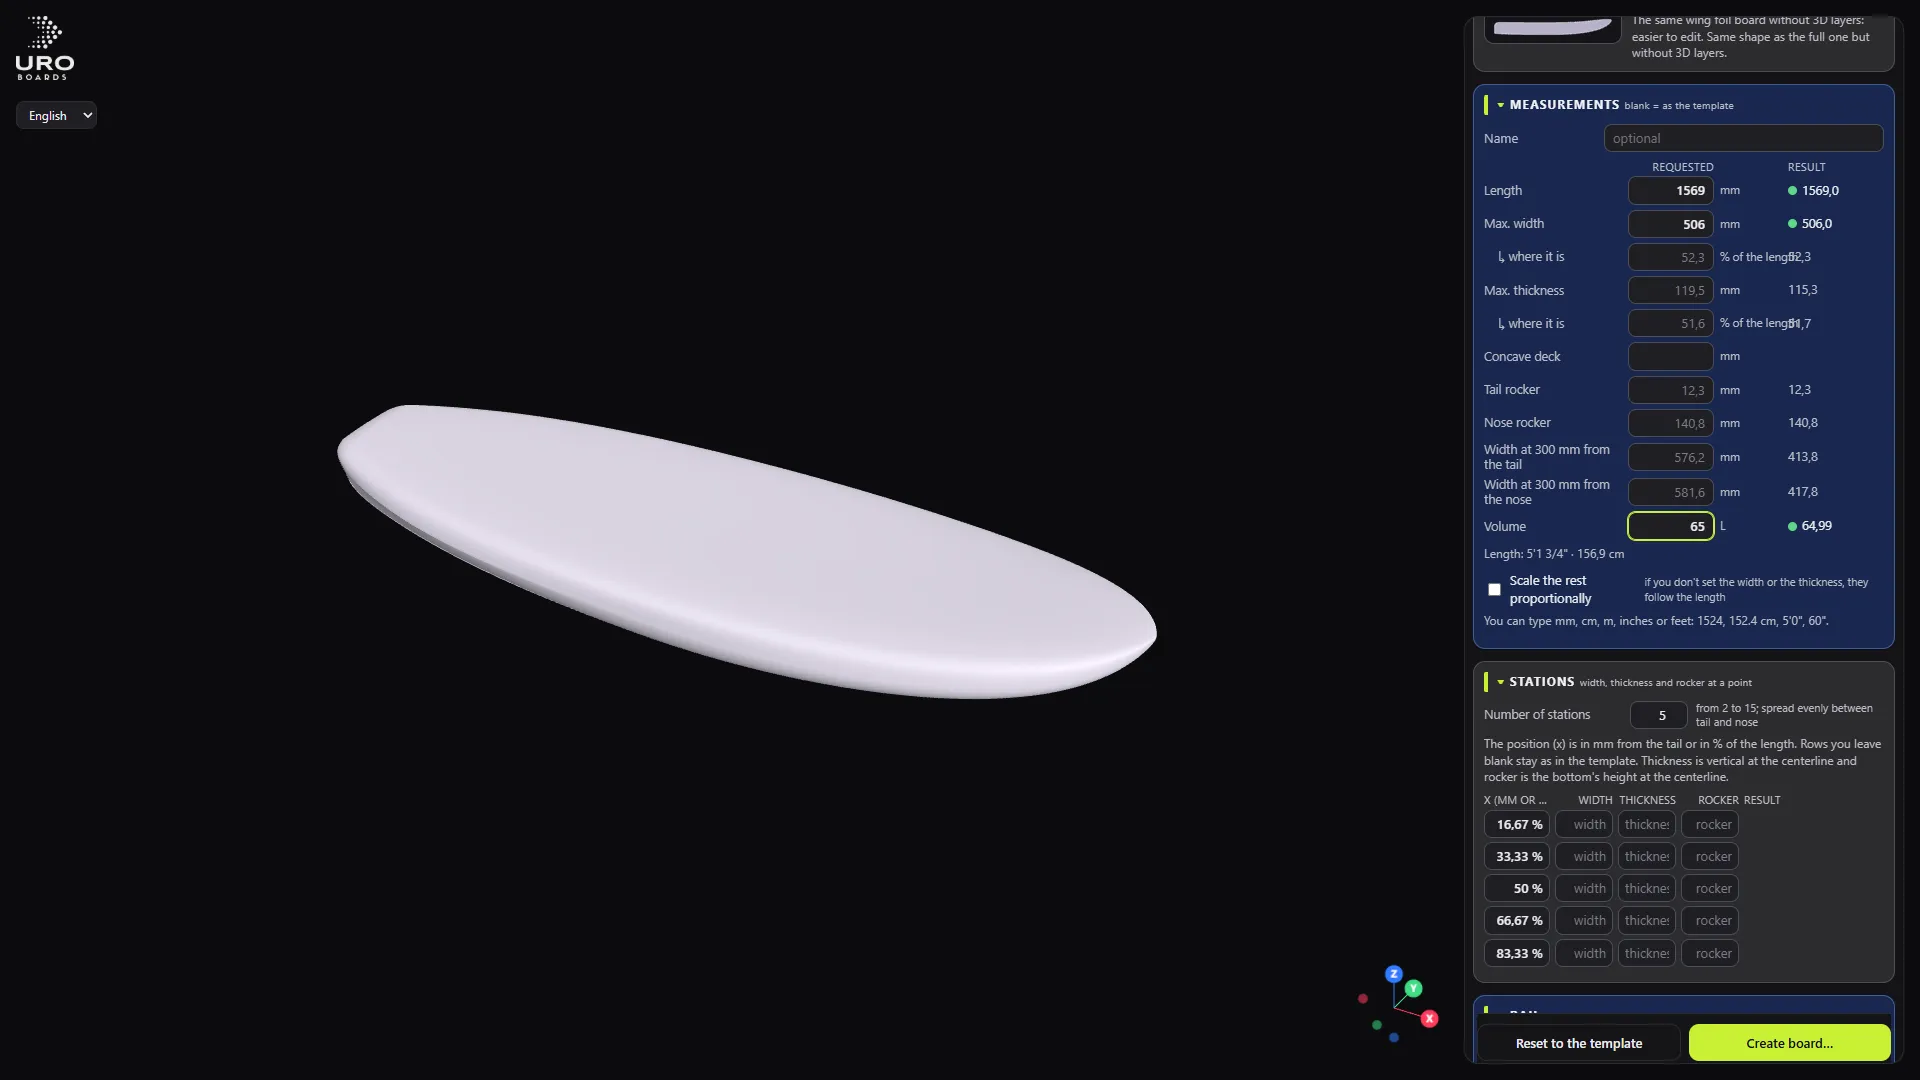
You don’t need to start from a file. With Create from photos or measurements you describe the board and the program builds it on top of a template, reshaping it until it nails what you asked for.
Open it from the start screen, with the card or the N key. The CREATE A BOARD panel opens.
Starting template
In TEMPLATE you pick the Type (wing foil, surf, windsurf, kitesurf, SUP) and the Template. Anything you leave blank stays as it is in the template.
Measurements
In MEASUREMENTS you only type in what matters to you. It takes mm, cm, m, inches or feet: 1524, 152.4 cm, 5'0", 60".
- Length, Max. width and where it sits, Max. thickness.
- Tail rocker and Nose rocker.
- Width at 300 mm from the tail and from the nose.
- Concave deck (0–30 mm).
- Volume in litres: unless other measurements get in the way, it adjusts the width and thickness.
With Scale the rest proportionally, if you don’t set the width or the thickness, they follow the length.
The table has two columns, Requested and Result, with a colour for each figure: within tolerance, close, or off. A real example: you ask for 69 L and get 69.006 L.
More control
- STATIONS: width, thickness and rocker at specific points, in mm from the tail or as a % of the length.
- RAIL: soft or sharp edge, thin or full rail.
- HULL: flat, V, single concave or double concave sections between two positions (+ Add hull section).
- BULB: a bump on the deck at the nose or the tail (+ Nose bulb, + Tail bulb). For the nose there’s a preset calibrated on a 69 L URO board.
- Board’s stations: how many sections the file has.
The preview recalculates by itself. At the end, RESULT and What’s been done walk you through every step of the calculation.
Click Create board…, choose where to save it and the program opens your new board. Press E to edit it. It never overwrites a file that already exists.
From photos
In the PHOTOS section of the same panel you add one photo per view. None of them is required:
- Plan / outline: the silhouette from above.
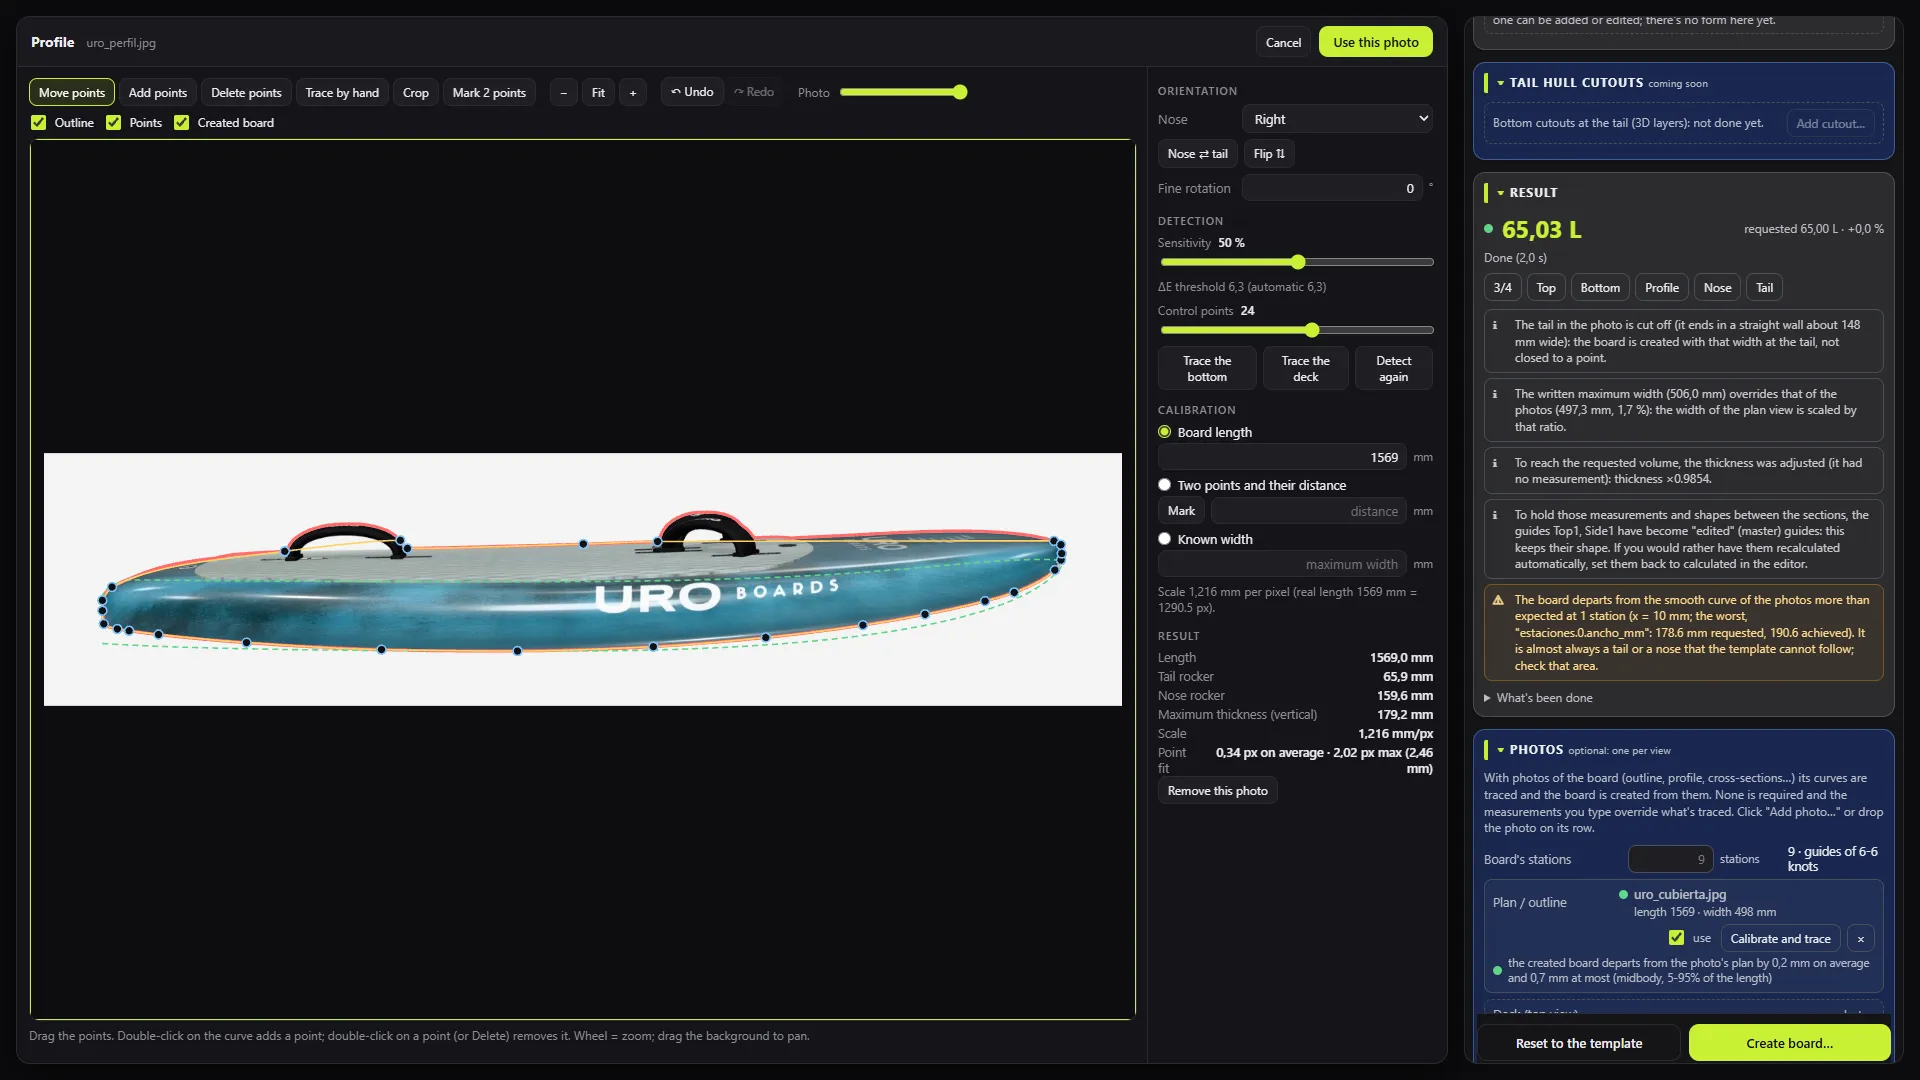
- Profile: the bottom rocker and the deck profile.
- Nose and Tail: the sections near each end.
- Hull: the bottom seen head-on at the widest point.
Each photo opens with Calibrate and trace. You calibrate with the real length or with Mark 2 points a known distance apart. The program detects the outline and you fix whatever points need it, or trace by hand. Nose ⇄ tail and Flip ⇅ sort out the orientation.
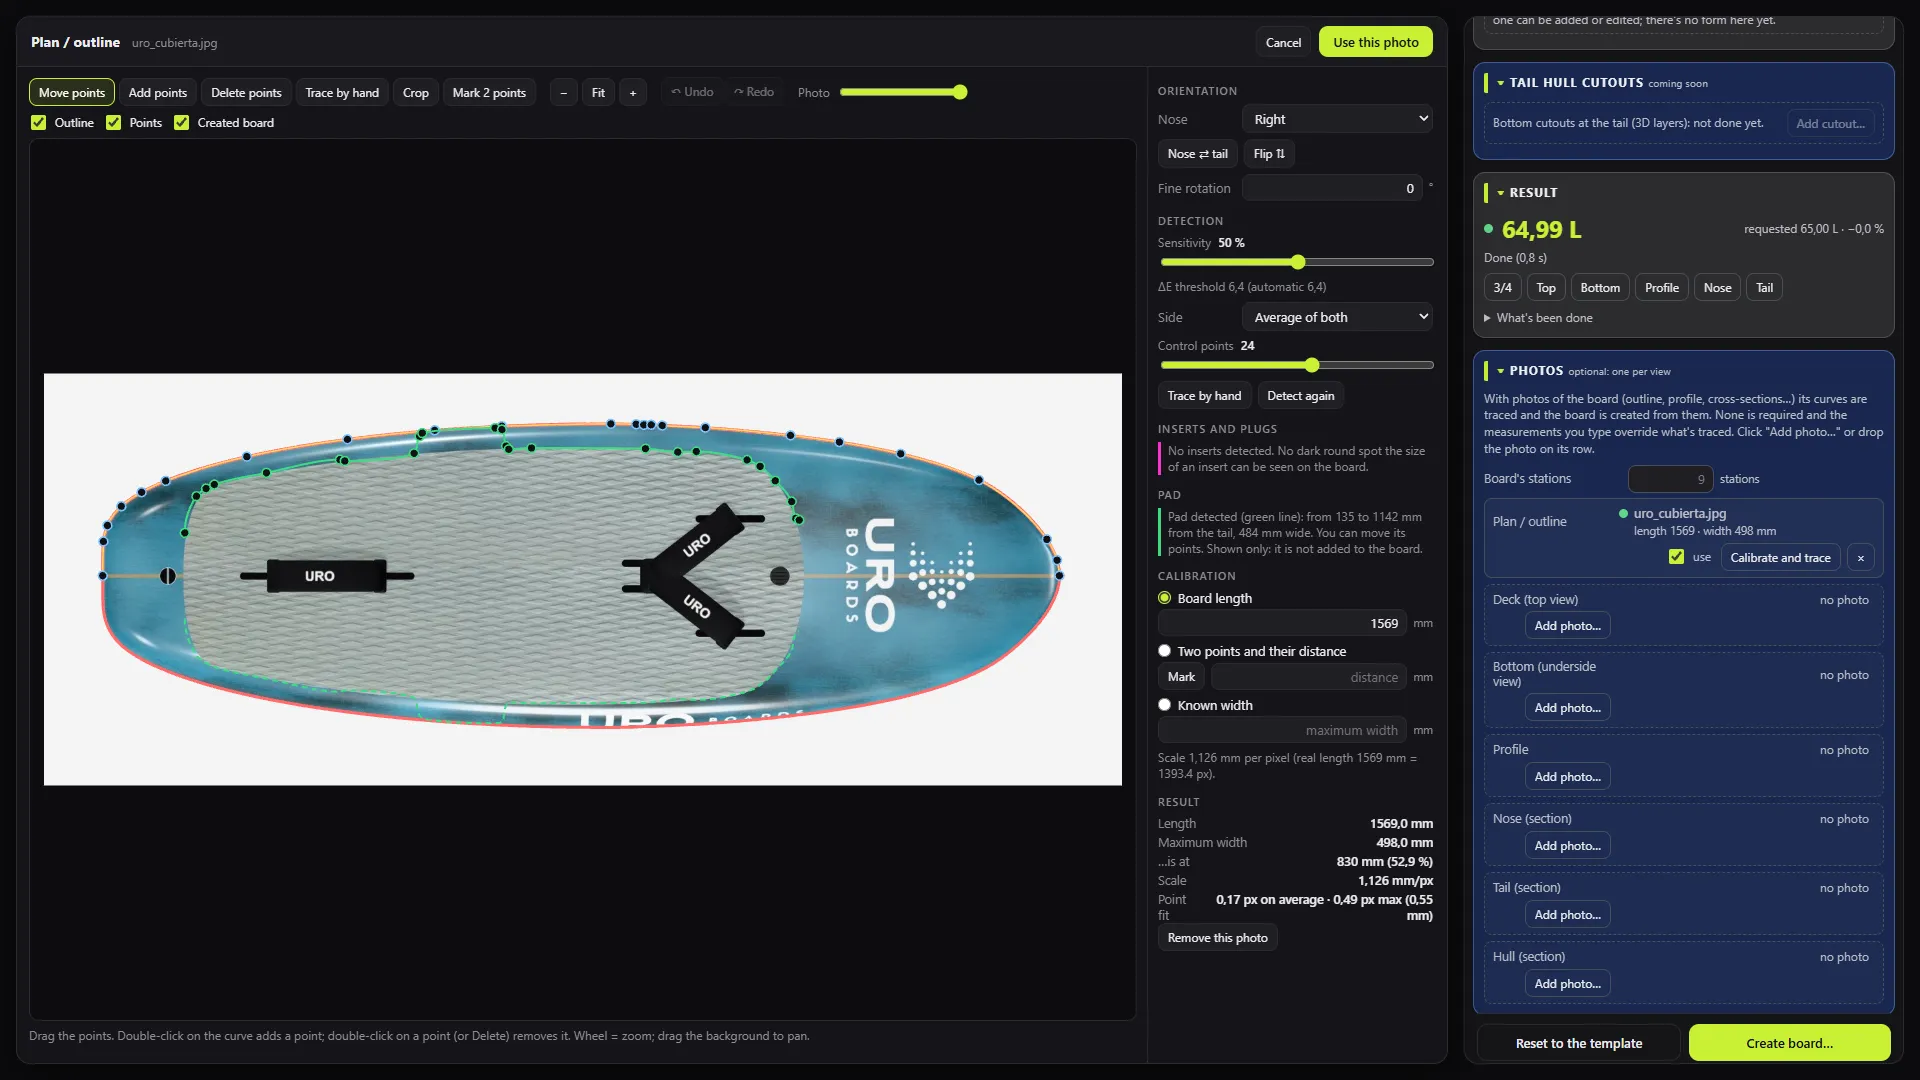
On the bottom photo you also mark the Inner rail line (bottom), the Foil boxes, the Inserts and plugs and the Pad. On the profile, a tail step is detected. Click Use this photo and the board is built from those curves.
Tips:
- Shoot square-on photos, with no perspective, a plain background and the whole board in frame.
- The measurements you type in win over the ones from the photo.
- If the shape from the photos doesn’t reach the litres you asked for, check the measurements: don’t force the volume by sinking the deck.
If you’re working with the AI, it can also pull colours and textures from the photos themselves for Finish mode.
What gets generated hasn’t been checked in your design program. Check it before you build.