Before this: Place the foil boxes, inserts and footstraps.
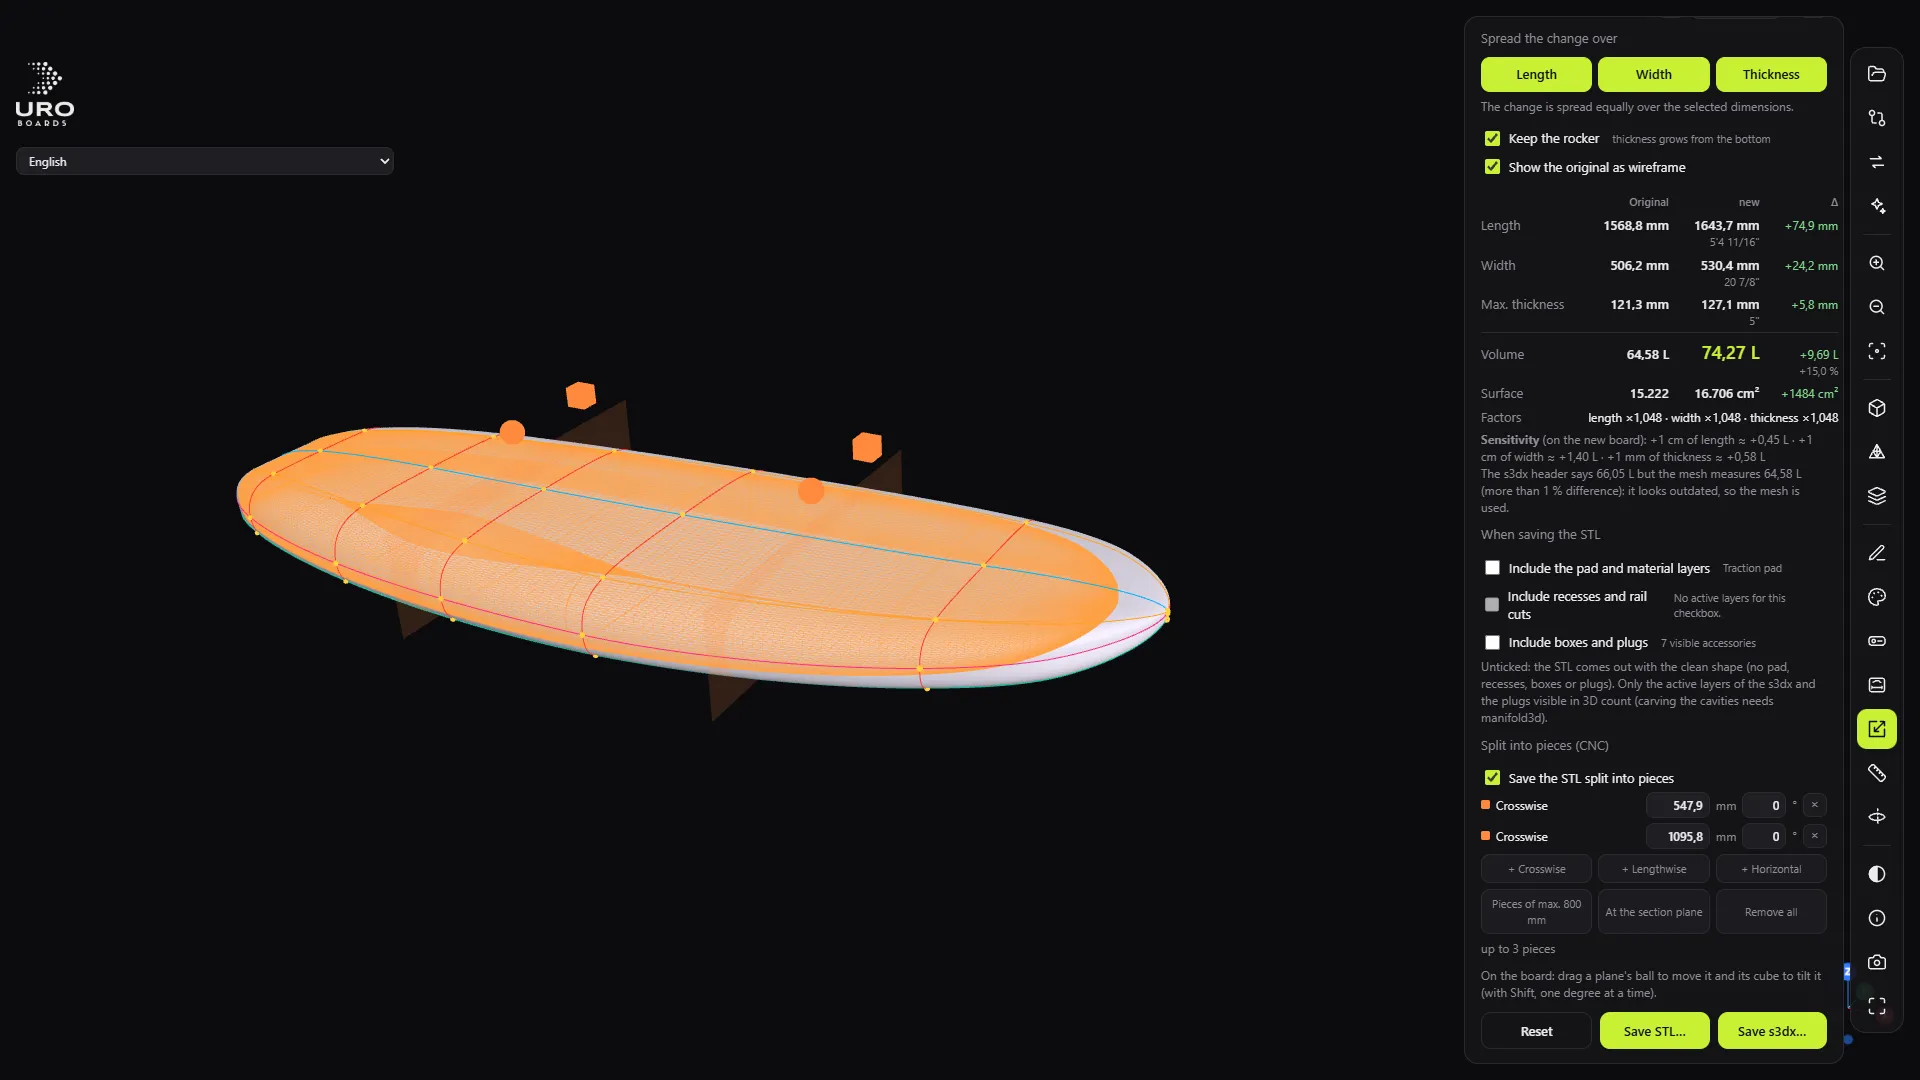
You’re going to export the board as an STL for machining: clean shape or with box cavities, whole or split into pieces that fit your CNC.
1. Open the board and the Rescale panel
Open the .s3dx and press R (or the Rescale button). The STL is saved from this panel even if you don’t change the size.
- Leave Target volume at the litres the board already has. Don’t touch the dimensions.
- If you have the editor open with changes, save them first: “Save editor changes first.”
Tip: if you only want the whole board, with no pieces, you can also use the Convert (V) panel, s3dx → STL tab.
2. Decide what goes into the STL
Under When saving the STL, the three tick boxes start unticked. That gives you the clean shape: no pad, recesses, boxes or plugs.
- Include the pad and material layers: if the pad is machined in the same block.
- Include recesses and rail cuts: deck recesses, deck dugout, cut rail.
- Include boxes and plugs: carves the cavity of every accessory visible in 3D, to the depth in the file.
Next to each box you can see what will go in. If one is greyed out, the board has no active layers or visible accessories of that kind.
Common mistake: missing a cavity. Accessories hidden in 3D aren’t carved. Show them first in the editor (E, P, VISIBILITY IN 3D) and save the board.
3. Turn on splitting
Scroll down to Split into pieces (CNC) and tick Save the STL split into pieces.
Choose how to cut:
- Pieces of max. 800 mm: spreads crosswise cuts so that no piece is longer than 800 mm.
- + Crosswise: a cutting plane at an x (mm from the tail).
- + Lengthwise: a plane running along the board, at a distance from the centre line (0 = the centre line).
- + Horizontal: a plane at a height in mm.
Each plane has its own position and tilt in degrees (0 = straight). Remove all deletes them.
Result: the planes appear over the board and the panel tells you the maximum number of pieces you’ll get.
4. Adjust the planes on the board
Drag a plane’s ball to move it and its cube to tilt it. With Shift, it rotates one degree at a time.
Tip: avoid cutting right over a foil box or an insert. Move the plane a few centimetres so the part stays whole in one piece.
5. Save
Click Save STL… and pick a folder and name.
Result: one STL per piece, name_1de4.stl, name_2de4.stl… (“1de4” = 1 of 4). Each one is a closed solid and sits in its proper place: put them together and they line up. The program lists the dimensions and litres of each piece.
If the program warns you that a cavity goes through the other face, comes out through the rail or falls outside the board, check that accessory before machining.
6. If you export a different size
If you change the litres in this panel before saving, the STL comes out rescaled. The box and plug cavities scale with the board: they don’t keep their factory size. Check their dimensions in your CAM before machining.
7. Check in your CAM
Open the STLs in your CAM or design program:
- volume and dimensions of the whole board;
- that the pieces line up;
- depth and position of the cavities.
The shape between sections is interpolated: the typical deviation from the reference STL is 0.1 to 0.2 mm, with a maximum of 2 to 3 mm at the tail and nose.
Cavity carving hasn’t been validated against a reference STL made with another program. Check it before machining.